
How to Change Wiper Blades
How to Change Wiper Blades
Windshield wipers are one of those car parts you probably don’t think much about—until it starts raining and you realize yours are doing more smearing than wiping. Fortunately, replacing wiper blades is usually a quick and inexpensive DIY job.
Get Familiar With the Parts
Before you start, it helps to know what you’re working with.
- The wiper blade – This is the part that contains the rubber wiping edge that makes contact with the windshield.
- The blade assembly or frame – This supports the rubber wiping element. Traditional wipers have a visible frame, while many newer beam-style blades have a more streamlined design.
- The wiper arm – This is the spring-loaded arm attached to the vehicle. It moves the blade back and forth across the windshield.
How to Remove the Old Blades and Install New Ones
Buy the correct replacement blades. Check your owner’s manual or use a vehicle-fit guide online or at an auto parts store. Keep in mind that the driver’s and passenger’s blades may be different sizes. If you’re unsure, your local auto parts store can usually confirm what you need—and there’s a pretty good chance they’ll have the blades in stock.
- Turn off the vehicle and position the wipers. Some newer vehicles require the wipers to be placed in a special service position before the arms can be lifted away from the windshield. Check your owner’s manual rather than trying to persuade them with brute force.
- Lift the wiper arm away from the windshield. Raise it carefully until you can easily reach the blade and its connector. Don’t force the arm beyond its normal range of movement.
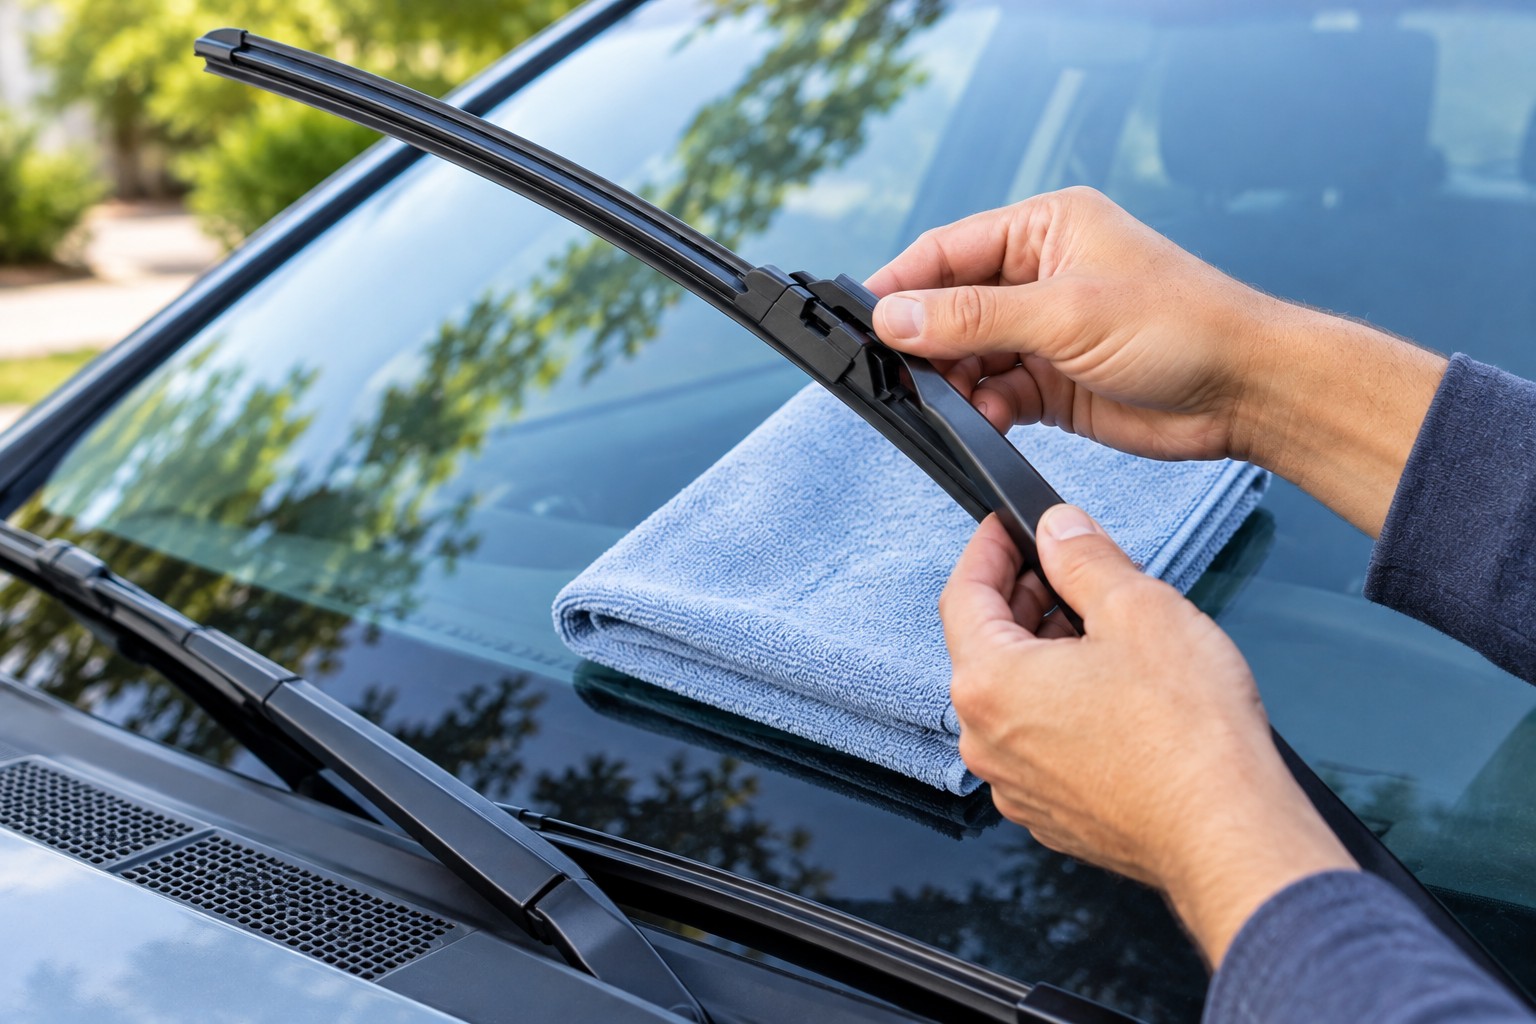
- Protect the windshield. Place a folded towel on the windshield underneath the raised arm. Once the old blade is removed, a spring-loaded wiper arm can snap back against the glass and cause a chip or crack. A towel is considerably cheaper than a windshield.
- Remove the old blade. Find the tab, button, clip, or other connector where the blade attaches to the arm. Release it and slide or pull the blade off. Wiper attachment systems vary, so check the instructions that came with your new blades if the old one seems determined to stay with the car forever.
- Install the new blade. Slide or press the new blade onto the wiper arm until you hear or feel it click securely into place.
- Give it a gentle tug. Make sure the blade is securely attached. Discovering that it isn’t during a downpour is not the preferred testing method.
- Lower the wiper arm carefully. Guide it back onto the windshield rather than allowing it to snap down.
- Test your work. Spray some windshield washer fluid and operate the wipers. The new blades should move smoothly and clear the windshield without excessive streaking, skipping, or chattering.
When Should You Replace Your Wiper Blades?
You don’t necessarily need to wait for a specific date on the calendar. If your wipers are streaking, skipping, chattering, leaving portions of the windshield uncleared, or showing cracked or damaged rubber, it may be time for replacement. Sun, heat, cold, ice, and regular use can all shorten the life of the rubber.
One Important Warning
Never allow a bare wiper arm to snap against the windshield after you remove the blade. The spring-loaded arm can hit the glass hard enough to chip or crack it. Keep control of the arm while you work, and leave a folded towel on the windshield until the new blade is securely installed.
Changing wiper blades isn’t the most glamorous part of vehicle ownership, but the first time you drive through heavy rain with a clean, streak-free windshield, you’ll be glad you spent a few minutes doing it.
At NHSA, our goal is to provide online driver education courses that equip all drivers with what they need to be safe drivers. Whether you are a teen seeking a learner’s permit, or an adult driver seeking a basic driver safety course, check us out online to see what courses are available in your state!